Homebrew Bonanza

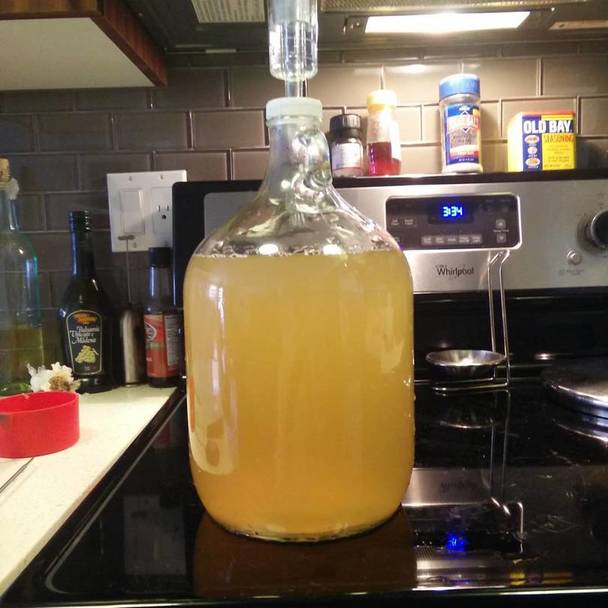
I started two homebrews last week - a porter and a gingered ale.

The Porter

The recipe I used here is almost exactly the same as the Sparrow Hawk Porter recipe found in the Complete Joy of Home Brewing. The main differences are that I scaled it down to one gallon and used different hops.

Hops

The recipe calls for Northern Brewer or Tettnang hops for boiling and aroma respectively. Fresh hops were only available in 1 oz packets so I would need to buy 1 ounce of Northern Brewer and another of Tettnang. But since I scaled down to a one gallon batch I only needed <= 1 ounce of hops total leaving 1.5 ounces of leftover. I wanted to avoid that much leftover as hops can spoil relatively quickly.

I decided to use the same hop for boiling and aroma in order to minimize leftovers. What hop to choose though? For whatever I reason I did not choose Norther Brewer, Tettnang or anything directly similar. Instead I chose Chinook hops which have spicy, piny aroma. Chinook typically have a higher Alpha acid concentration (12.1%) than Northern Brewer. This means I needed to adjust the amount of Chinook I would use in order to achieve similar bitterness levels I would have gotten from Northern Brewer.

Was the hop swap okay? TBD.

Data Dump

Keep in mind the quantities/measurements below are for a one gallon batch.

Ingredients:

  • 0.9 pounds light/amber liquid malt extract - brand unknown as I bought in bulk
  • 0.67 pounds dark malt extract - CBW Traditional Dark LME
  • 0.20-0.25 pounds black malt
  • ~ 0.21 ounce Chinook hops for boiling (bittering)
    ** Recipe called 13 HBUs which is about 0.21 ounce of hops with 12.1% alpha acid
  • ~0.1 ounce Chinook for aroma
  • 0.25 tsp Irish Moss - helps with beer clarity
  • ~ half packet Safale S-04 yeast
  • 1 gallon pure water

Timeline/Process:

  1. Brought half gal water to 155°F and steeped black malt in grain bags for 30 minutes
  2. Removed grain, brought to boil and added malt extracts + boiling hops
  3. Boiled and stirred for 50 minutes (rolling boil important for bittering)
  4. Added moss at 50 minutes in, continued boiling
  5. Added aroma hops in final minutes
  6. Put remaining half gallon of cold water in carboy
  7. Funneled/filtered the hot wort into the carboy
  8. Aerated vigorously and chilled to 70°F
  9. Pitched yeast and attached blow off tube
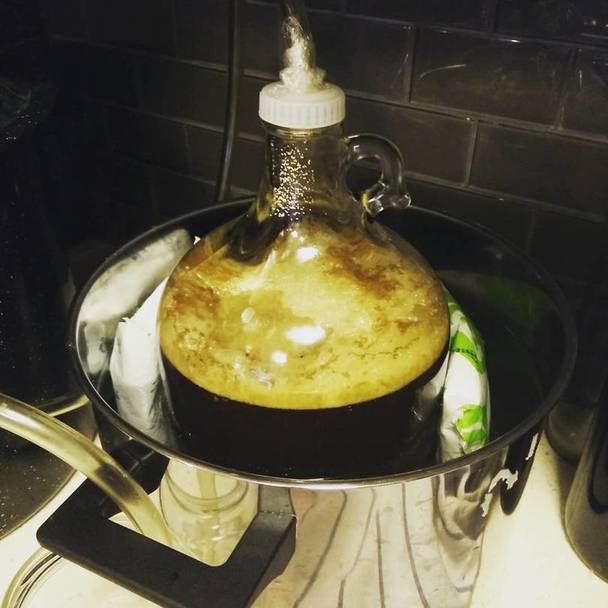
  10. Put carboy in large kettle with cool water and ice packets
  11. Allowed to ferment ~ 1 week, replacing ice packets daily in order to maintain optimum temp range
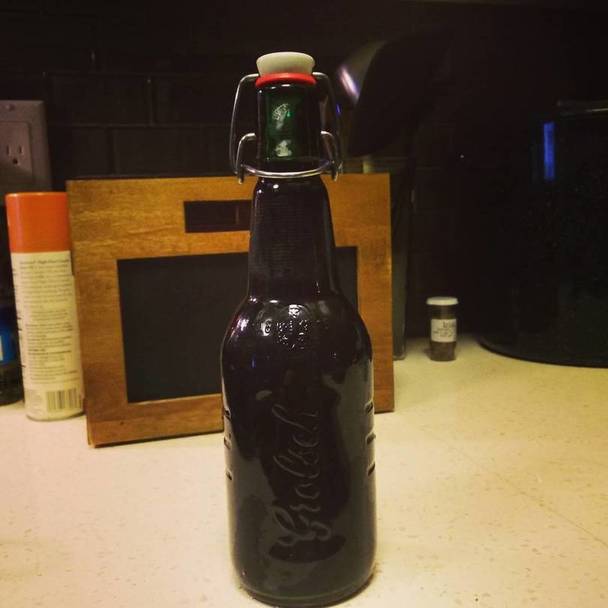
  12. Primed and bottled

Measurements:

  • O.G. was 1.060 (yes! the O.G. is expected to be between 1.058 and 1.062 for this recipe)
  • F.G. was 1.020 or 1.021
  • Start date was August 30th 2015
  • Bottle date was September 5th 2015

Result

Still in bottle conditioning - TBD

Bottled Porter

The Gingered Ale

I used the leftover Dark LME and Chinook hops but added maybe 2 or 3 ounces of ginger.

Ingredients:

  • 1.36 pounds dark malt extract - CBW Traditional Dark LME
  • Remainder of Chinook hops from above
  • 3 or 4 ounces of finely chopped ginger (shredded would be better)
  • Remainder of Safale S-04 yeast packet

Measurements:

  • O.G. was 1.045

Result so far

Still fermenting.

Fermenting Gingered Ale

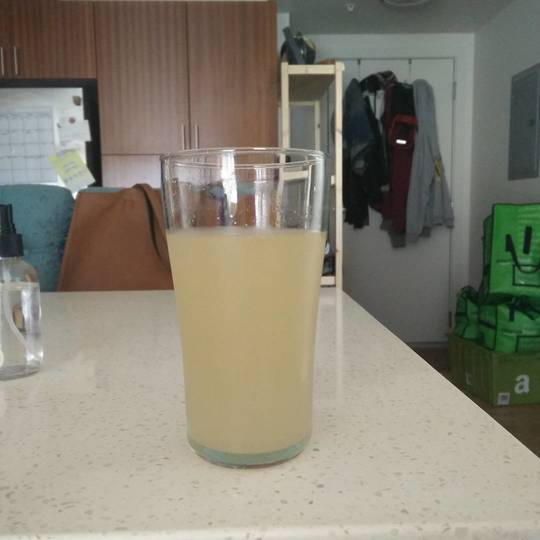
Follow-up on my Kölsch

I did this one several months ago - April or May I think. It was only last week though that I cracked open the bottles of it I had in the fridge. I had been avoiding them because I was convinced they were shitty because I messed up when brewing it. I let my kettle boil over, used too much yeast and may have let it get too warm. I had a sampling after I bottled - it had interesting and slightly intense off flavors that I did not care for.

After it chilled in the fridge for a few months though, it was not bad at all, I enjoyed it. A pleasant surprise. You do not need to execute your process/recipe perfectly in order to get really good beer! Beer is resilient! In other words - do not worry, relax, have a homebrew.

Ginger Brew - attempt 2

I decided to do another batch, the last was good but I wanted more spice!

Modified Recipe

  • ~15 tablepoons of shredded ginger (double over the last one)
  • 2 cups sugar
  • 1 mashed up fresh peach
  • couple dashes allspice
  • juice of 1 large lemon

Result

Really spicy, maybe a little too spicy.

Ginger Beer

Bottling the Ginger Beer

After a week of extremely slow fermentation, I decided to bottle. Nothing particularly exciting about the bottling process - I made a gravity siphon and transfered the brew into my Grolsch swing top bottles. I took a sample as well.

Notes

  • Gravity barely changed - O.G. was 1.029 and the reading from the sample was roughly the same
  • Taste: gingery and sweet up-front but a weak after taste, not as gingery as I would like

My next brew will use much, much more ginger. I think the addition of some spices would help give the brew a stronger finish.

Ginger Beer

Next

Now that it is bottled, just need to wait a while. Hopefully the result will be nice and bubbly.

Brewing Ginger Beer

In my previous post I talked about making a ginger bug and today I will talk about using the ginger bug to start brewing ginger beer.

Recipe

I just halved this one so I could do a 1 gallon batch. That recipe did not give an exact amount of ginger to use, I used about 6.5 packed tablespoons of roughly, freshly shredded ginger.

My Process

  1. Put 1/2 gallon water in a large pot on my stove and the other half directly into my carboy
  2. Added all shredded ginger (6.5 packed tablespoons) into pot and brought to boil
  3. Once boiling I reduced the heat and let simmer for ~20 minutes
  4. Strained out the ginger and stirred in 1.5 cups of raw sugar (I also took a sample to measure the O.G.)
  5. Funneled the ginger wort into my carboy
  6. Put carboy in a small ice bath until the temperature of the ginger wort reached about 80 degrees Fahrenheit
  7. Added a good 1/2-1 cup of strained ginger bug
  8. Added juice of 1 large lemon
  9. Attached airlock and set aside

Results so far

The wort was spicy and sweet. Its original gravity was about 1.029.

Ginger Beer in Carboy

Next

Hopefully fermentation starts - if it does I will need to transfer the ginger beer into bottles so that it becomes carbonated. Stay tuned!

The Ginger Bug

I love Ginger Beer. I have read/heard that it is pretty easy to make and that the homemade stuff can be way better than the readily available kind. I decided to give it a try. After reading around, I found that the first step is to make a ginger bug. It is not actually a bug - just a fermenting ginger/sugar mixture :)

Making the Bug

I followed this recipe. Here are some tips that I gathered:

  • Non-irradiated ginger is recommended - if it is irradiated the bacteria may not be able to thrive on it. Organic ginger is your best bet for this.
  • Use non-chlorinated water - chlorine kills microbes. Easiest way is to get bottled water, but there are ways to de-chlorinate tap water too.

My result:

My Ginger Bug

Next

I will keep following the recipe instructions by feeding the bug sugar and ginger. Hopefully it will start fermenting after a few days and I can make a post about making something with it. The obvious ‘something’ is ginger beer, but it seems any sufficiently sugary liquids can be fermented using the bug. Here is a recipe for fruit/tea soda.

Using s3cmd to deploy your S3 Website

Overview

This short post describes how to use s3cmd to deploy content to your Amazon S3 Website. This is useful if you are using some sort of static website generator and want to upload the content to an S3 bucket (where it can be served to your users).

Before you start

This post assumes you have already set up your static website. If you need to, follow this AWS walkthrough to set up your site with a custom domain. One gotcha - if your domain name is ‘example.net’, then your S3 bucket needs to be named exactly ‘example.net’.

Deploying your content

Create a user/policy for s3cmd

s3cmd needs credentials in order to interact with your S3 buckets. I recommend not using your root credentials and instead creating an IAM policy and user for s3cmd. In the IAM console create a policy with this body:

1
2
3
4
5
6
7
8
9
10
11
12
13
14
15
16
17
18
19
20
21
22
23
24
25
26
27
28
{
"Version": "2012-10-17",
"Statement": [
{
"Sid": "Stmt1397834652000",
"Effect": "Allow",
"Action": [
"s3:ListAllMyBuckets"
],

"Resource": [
"arn:aws:s3:::*"
]
},

{
"Sid": "Stmt1397834745000",
"Effect": "Allow",
"Action": [
"s3:ListBucket",
"s3:PutObject",
"s3:PutObjectAcl"
],

"Resource": [
"arn:aws:s3:::YOUR_BUCKET_NAME",
"arn:aws:s3:::YOUR_BUCKET_NAME/*"
]
}

]
}

Now create an IAM user and save the access key id/secret. Apply the policy from above to the user you created. I usually save the credentials into a shell script like so:

1
2
3
4
5
#!/bin/bash

# creds.sh - DO NOT SOURCE CONTROL THESE CREDENTIALS. IF YOU DO, DEACTIVATE THEM IMMEDIATELY.
export DEPLOY_KEY_ID='PUT ACCESS ID IN HERE'
export DEPLOY_KEY_SECRET='PUT SECRET HERE'

and then run:

1
source ./creds.sh

This makes the credentials available via the environment variables $DEPLOY_KEY_ID and $DEPLOY_KEY_SECRET.

Write the deploy script

Now, to wrap everything up with the deployment script:

1
2
3
4
5
6
7
8
9
10
11
12
#!/bin/bash

# deploy.sh

s3cmd sync DIRECTORY_CONTAINING_YOUR_WEBSITE_CONTENT/* s3://YOUR_BUCKET_NAME/ \
--guess-mime-type \
--no-mime-magic \
--add-header=cache-control:public,max-age=7200 \
--no-preserve \
--acl-public \
--access_key=$DEPLOY_KEY_ID \
--secret_key=$DEPLOY_KEY_SECRET

You can read about the various flags I used here. I am using the –add-header option to add some basic cache-control to anything served from the S3 bucket.